Start Here
You can start learning Gideros here :-)
Creating a new Gideros project
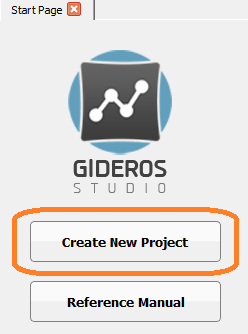
Start Gideros Studio and choose Create New Project
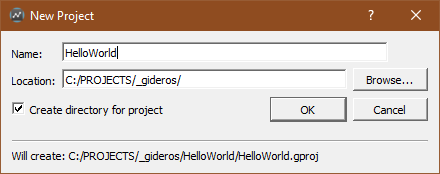
Give your new project a name and a destination folder.
Adding assets
1st Method
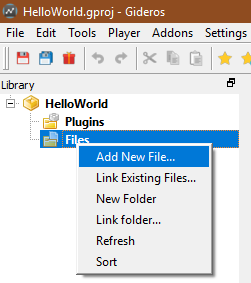
To add assets to your project (images, sounds, fonts, ...), right click on Files then Link Existing Files
 (as you can see, you can also create new folders, link existing folders, ...)
2nd Method
In your file explorer, navigate to your project assets folder. Here you can create folders, create new files, add assets, ...
Then in Gideros Studio, right click on Files then Refresh
Getting ready to code
To start coding in Gideros Studio you need to add a main.lua file
To add files to your project right click on Files then Add New File
Then type main.lua and select OK
You are ready to code! You will write the following examples in this main.lua file.
Happy coding :-)
Display image
To display an image, we first create the Texture object by providing a path to the image file and an optional boolean parameter which indicates if the image should be filtered (anti-aliased).
We then create a Bitmap object, position it at some coordinate (default are 0,0) and add it to the stage to be rendered.
local bmp = Bitmap.new(Texture.new("ball.png", true))
bmp:setPosition(100, 100)
stage:addChild(bmp)
Display text
To display some text, we first need to create a Font object, in this case we will use a TTFont. We provide a path to the font file, the size of the text and an optional boolean parameter which indicates if the image should be filtered (anti-aliased).
Then we create a TextField object by passing the Font object and the text we want to display.
After that we simply set the position of the text and add it to the stage to be rendered
local tahomaFont = TTFont.new("tahoma.ttf", 50, true)
local text = TextField.new(tahomaFont, "Hello World!!!")
text:setPosition(100, 100)
stage:addChild(text)


